
Original Author: Colin, PB Motorsports | February 13, 2021
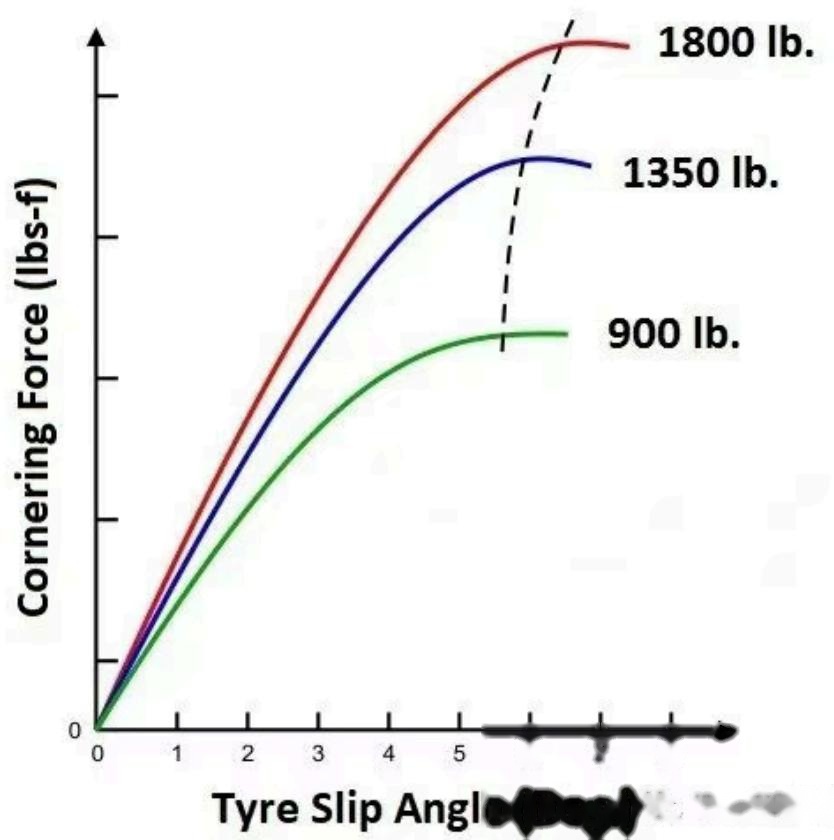
In "Tuning Basics — Tire Upgrades," we covered the fundamentals of tires, from tire deformation to slip angle and how grip changes under load. At the end of that article, we introduced the concept of tire load sensitivity and its two key takeaways:
- The rate of grip increase slows down as vertical load on the tire increases.
- The slip angle corresponding to peak grip grows larger as tire load increases.
We also left you with a question: why do race cars use anti-Ackermann steering geometry? To answer that, we need to discuss a topic every driver loves: weight transfer. But before we get there, let's unpack what this "A-something" geometry actually is. It may not be essential for driving fast, but it's great for enriching your knowledge (and showing off).
01 Ackermann Steering Geometry
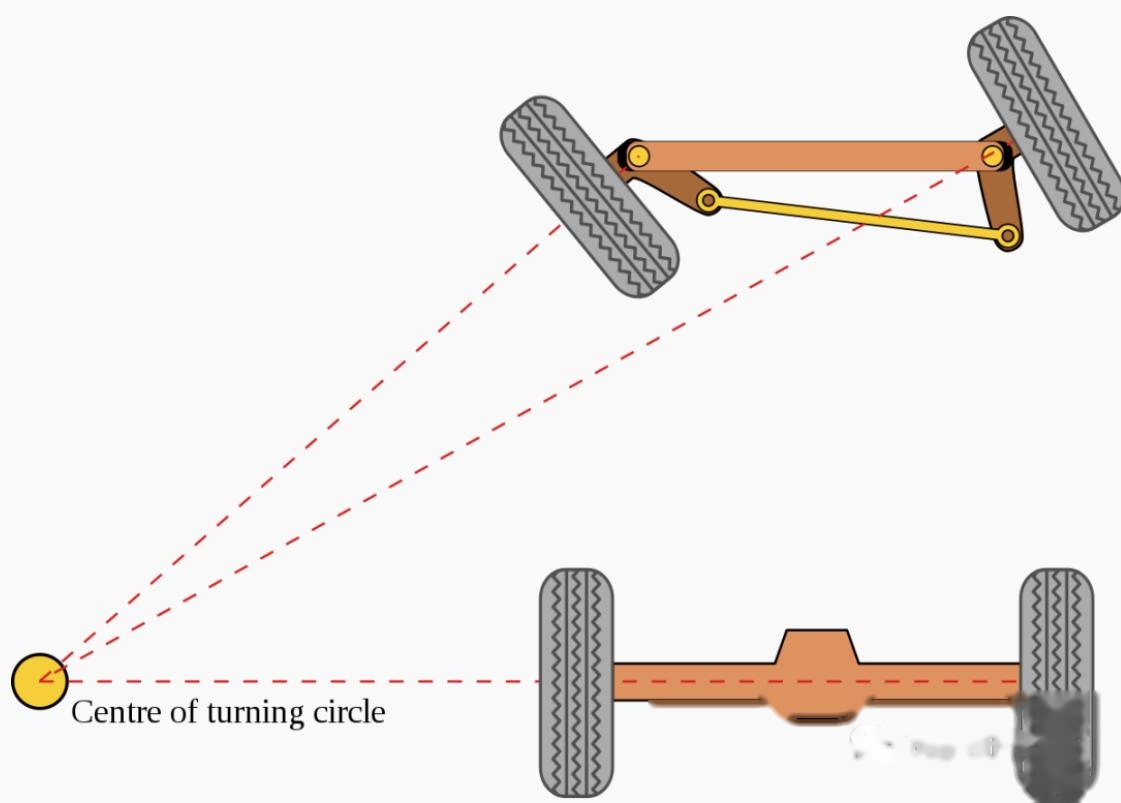
Ackermann steering geometry is actually a straightforward concept: to let a vehicle corner smoothly, the steering angle of the inner wheel must be slightly larger than that of the outer wheel — the two wheels trace concentric circles around the same turning center. However, because of slip angle, this idealized picture is not quite correct. Assuming both tires carry identical load, the slip angle causes each tire's actual rolling path to be slightly larger than the circle defined by the direction the tire is pointing. To achieve true Ackermann geometry in practice, both tires must be steered a little further to compensate for the path shift introduced by the slip angle.
So if pro-Ackermann is the ideal, why do many race cars favor an anti-Ackermann design — where the outer wheel's steering angle is actually larger than the inner wheel's? The answer lies in weight transfer and tire load sensitivity. When a vehicle corners at the limit of grip, weight transfer shifts load from the inner tires to the outer tires, increasing the load on the outer tire and decreasing it on the inner. To let both tires deliver maximum grip, the slip angle of the heavily loaded outer tire must be larger than that of the inner tire. Consequently, the steering angle needed on the outer wheel to counteract its larger slip angle must also exceed the inner wheel's.
With that foundation laid, the real prize is understanding how to harness weight transfer to become a cornering ninja.
02 How to Utilize Weight Transfer
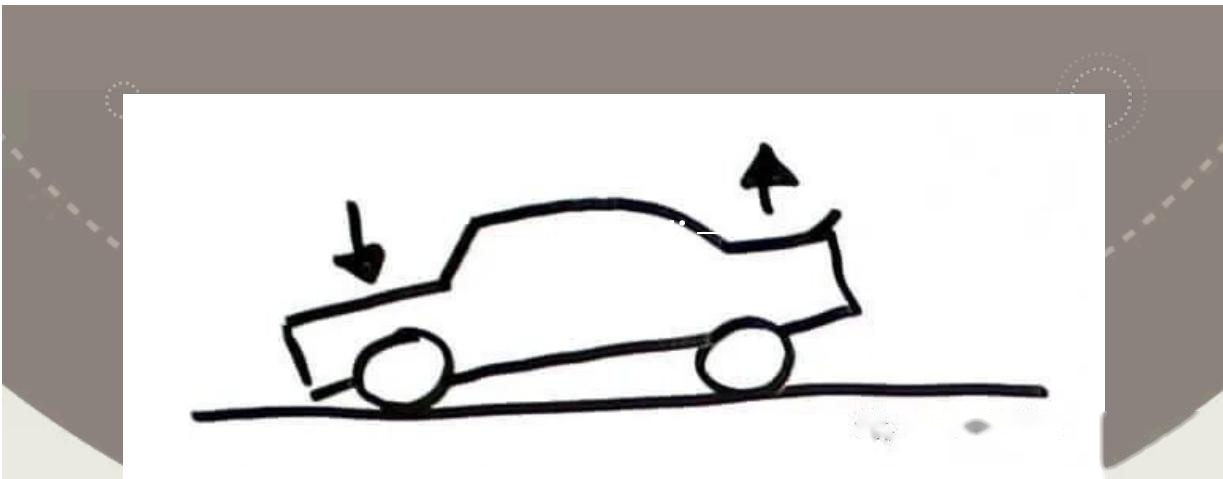
Weight transfer stems from inertia. As long as an object has mass, it resists changes in motion. Imagine throwing a ping-pong ball versus a shot put — the shot put's greater mass and inertia make it far harder to accelerate. A car's mass can be roughly divided into two categories: sprung mass and unsprung mass.
Sprung mass is everything supported by the suspension — the chassis, engine, and body. Unsprung mass is everything the suspension does not support — primarily the wheels. Both masses have a center of gravity (CG), the focal point where forces act on them. When the car accelerates, decelerates, or turns, its inertia pushes back, as if a force opposite to the direction of motion were acting upon it. For the sprung mass, the suspension and tires react to this "force": the suspension and tires on one side compress under increased load while the other side extends under reduced load. At that moment, the effective center of gravity has shifted toward the loaded side. Unsprung mass undergoes a similar process, but only the tires react to its inertial force.
Because the tires and suspension need time to respond, weight transfer does not happen instantaneously. This is why a driver's inputs must be progressive and smooth — they must match the speed at which the vehicle's weight actually transfers. Stomping the throttle on launch, for example, only spins the wheels instead of accelerating the car. Let me say it again: inputs must absolutely be smooth. This is the fundamental rule of track driving. Abrupt inputs, at best, cost you lap time; at worst, they cause accidents. It is an unacceptable habit.
So how do you know if your inputs are smooth enough? We have a powerful tool for that.
Remember the traction circle from the previous article? The same diagram can represent G-forces (acceleration), and every driver carries a mental traction circle in their head. On track, G-forces deliver our most direct and nuanced feedback. For a driver, this feedback is one of the most vital tools for understanding weight transfer and the quality of their own inputs. Using your "butt dyno" to feel the car's dynamics and using that feeling to refine your car control is not easy — it demands long-term experience. But consciously trying to sense G-force changes and using that sensation to judge whether your inputs are smooth is a discipline every driver must cultivate.
Below is an operational example of me taking a corner in a racing simulator. Let's see what was done right and what needs improvement.
The corner in question is Stowe at Silverstone — a large-radius right-hand turn at the end of a long straightaway, which means the trail braking phase here is quite long. Looking at the telemetry, we have steering angle, brake pressure, and throttle position. Because the car is a GT3 racer, left-foot braking and paddle shifters are used. First, as I enter the braking zone, I lift off the throttle and apply the brake — but the pedal application is not rushed, giving the car time to transfer its weight forward. The auto-blip during downshifts creates small bumps in the throttle trace.
Next, as turn-in begins, brake pressure is slowly released while the steering wheel is simultaneously and progressively turned. The coordination of braking and steering manages the weight transfer, moving the load from the front along the outer edge of the traction circle toward the left, using all available grip as efficiently as possible. At the apex, the brakes are fully released and the steering angle should be at its maximum. But we see the first problem: perhaps because I turned in too early, the steering angle actually had to increase further as I began applying throttle on exit. Then, during the exit phase, I feed in the throttle slowly to shift weight rearward while simultaneously and smoothly unwinding the wheel. Here the second problem appears: I applied the throttle a bit too eagerly, requiring a flick of counter-steer to catch a snap of oversteer, followed by a brief lift. Finally, it's full throttle, steering straight, heading to the next corner.
After enough practice, a driver builds a mental map of G-force changes at every moment. You won't need telemetry anymore; relying purely on your "butt dyno" will let you properly use weight transfer and tire grip.
03 Principles of Weight Transfer Driving
After throwing around so many concepts and terms, does this all feel a bit abstract? When applying these ideas behind the wheel, what principles should guide you toward better use of weight transfer? Here is a rough set of driving principles to help you adapt and leverage weight transfer for better lap times.
- Vehicle dynamic transitions require time. Whether braking or steering, match the speed of your physical inputs to the time the vehicle's dynamics need to shift.
- Adapt your braking speed to suspension spring stiffness. Stiffer springs transfer load to the tires much faster, so they demand quicker brake pedal inputs. Softer springs call for slower, more deliberate application.
- Increasing load on a tire increases its grip — up to a point. Beyond a certain threshold, grip actually falls off. Do not force load onto a tire just to "push" it. This is why drivers who hurl the car into a corner with screeching tires are often much slower than those with smooth, flowing inputs.
- Avoid blind modifications. Before tuning chassis balance, a driver should have a clear understanding of what they want from the vehicle's dynamics — ideally as specific as: "I want the left/right tires in high/low-speed corners to bear more/less load with a faster/slower transition speed." Ultimately, all chassis requirements manifest as weight transfer.
- Learn to feel the limits of G-forces with your body. Developing a feel for vehicle dynamics in the rain helps build confidence and mastery over your car's behavior in all conditions.
- Learn to use telemetry data. Data helps you analyze weight transfer and cultivates your physical intuition.
Weight transfer is not an abstract concept — it is the language your car speaks through the steering wheel and the seat. The sooner you learn to listen, the sooner you will find speed you did not know you had. Have questions or your own insights? Leave us a message — we will tackle the concepts readers find most puzzling in future articles.