
Original Author: Colin, PB Motorsports | December 30, 2020
This article is fundamentally different from all the generic tire knowledge you can find online — we are not another basic copy-and-paste post! This discussion focuses on track performance tires and how to select and use them. Rally tires and snow tires are not covered here.
Tires are the only part of a race car that makes contact with the road surface. Their performance is closely tied to lap times and, in some cases, serves as the bottleneck for lap times. This is why tires received the highest number of votes as the "first modification part" in a previous TOP-GT questionnaire. But is tire modification really as simple as it seems? How many pitfalls have veteran drivers encountered along the way?
Important Tire Parameters
Section Width
Usually measured in millimeters (mm), section width represents the distance between the two sidewalls of the tire, which to some extent determines the contact area between the tire and the road. Due to differences in sidewall design and tire pressure settings among brands, the contact area is not entirely determined by section width. Tires of the same width from different brands may have different contact areas. The combination of tire width and wheel width also affects steering feel to a certain degree.
Wheel Diameter
As the name suggests, this is the distance from the center of the wheel to the tire bead, and the value must match the wheel size you are using — a 17-inch wheel must be paired with a 17-inch tire. Diameter also affects vehicle performance. Generally speaking, for a given vehicle, larger-diameter tires mean thinner sidewalls and better overall tire rigidity, but on the other hand, weight increases. For lap times, it is a trade-off between rigidity and weight.
Grip
Tire grip is influenced by multiple factors and is not a simple middle-school physics friction model. We usually use the G-force value to represent the grip a tire can withstand. This physical parameter is not printed on the tire. A tire's grip varies depending on factors such as temperature, tire weight, treadwear life, driver skill, and more. Furthermore, lateral grip and longitudinal grip are different. How well a driver utilizes tire grip often reflects their control over the vehicle. All racing techniques revolve around maximizing tire grip.
Treadwear
Treadwear is usually represented by a number from 0 to 600. Generally, the larger the number, the more wear-resistant the tire and the lower the grip. However, there is no unified industry calculation formula for treadwear; there are massive differences between brands. It can generally only be used as a reference and not for absolute comparisons. Grip and wear themselves are also influenced by many factors, so this parameter only has reference value for tire categorization — and in some cases, it is not very meaningful.
Tread Pattern
Every tire's tread design is different, usually corresponding to its intended usage scenario. The tread of passenger tires leans toward quietness, water displacement, and safety; extreme racing tires have no tread pattern at all — commonly known as slick tires. For drivers, it is difficult to fathom the design principles and concepts behind tread patterns unless they cooperate deeply with manufacturers. Therefore, what we need to focus on are the wheel alignment recommendations and usage scenarios provided by the manufacturer based on the tire's tread pattern and compound.
Working Temperature
Like many other vehicle components, tires have an optimal working temperature range, which is a focal point of the manufacturer's tire design. Operating below or above the designed temperature range will result in poor grip, increased wear, or tire damage. Tire temperature management is usually one of the driver's most important tasks.
Compound
The tire compound determines the various characteristics of the rubber. This is also an area that drivers cannot fully comprehend. Typically, we only differentiate between slick tires, R-compound tires, and other DOT-approved tires. In some contexts, "slick" and "R" are mixed up, causing confusion.
Heat Cycle
The process of a tire reaching its working temperature range from cold and then falling back outside the working temperature range is called one heat cycle. For certain performance tires, there is an upper limit to the number of heat cycles. Once the number of heat cycles exceeds the design limit, the tire's performance will drop significantly.
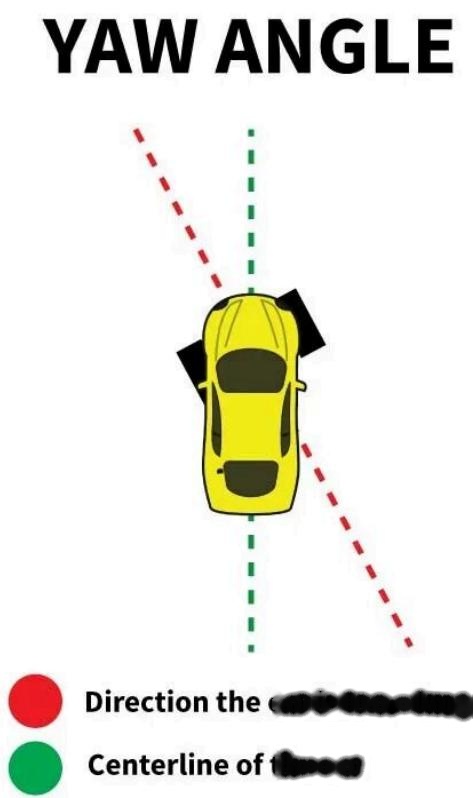
As we can see, the vast majority of physical tire parameters do not determine whether a tire is good or bad. For us, they mainly describe tire characteristics so that we can use them more effectively.
How to Use a Tire
New and veteran drivers alike may have already noticed that tires are the only medium through which a vehicle contacts the ground (under normal circumstances). All operations we perform on the vehicle — accelerating, braking, steering, and their combinations — must ultimately alter vehicle dynamics through friction between the tires and the ground. The vast majority of vehicle design and tuning is also dedicated to controlling tire behavior at the limit. So, what are the working principles behind these unassuming black rubber rings? What conclusions has humanity drawn from the history of taming wild tires?
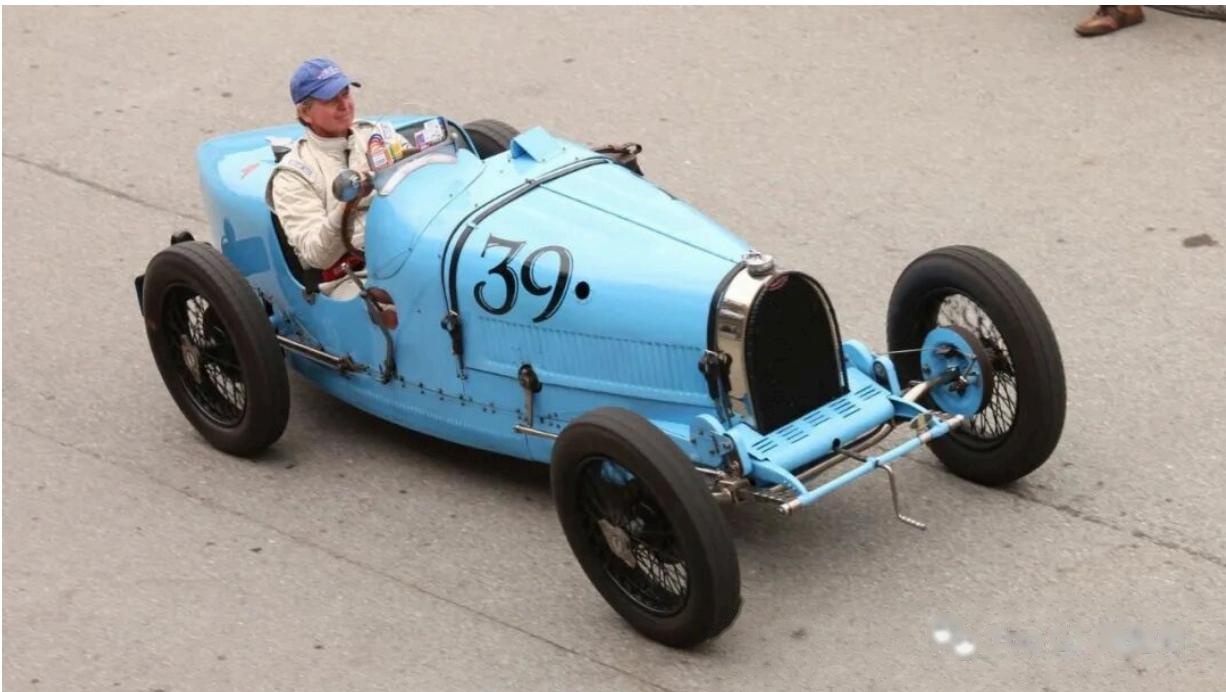
Before the 1950s, car tires looked similar to bicycle tires.
These tall, narrow tires were very insensitive to changes in the road's camber angle. You can see that race cars of that era even had positive camber, yet everyone drove them regardless. Because of this, no one cared too much about tires — since managing them didn't help, why bother? (Just my guess.)
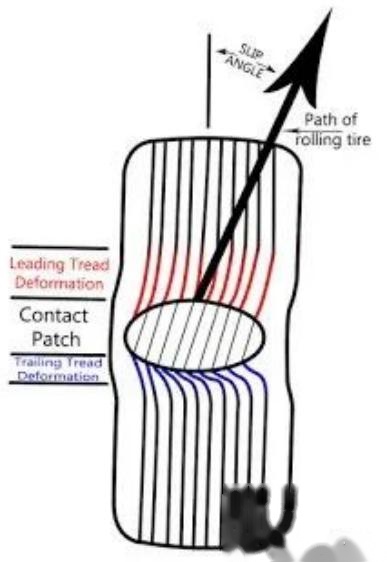
But as time progressed, race cars became more powerful, and people gradually realized that bicycle-like tires were not quite enough, thus beginning the long march to widen tires. Humanity first became curious about how tires generate grip, so they took a rubber ring and repeatedly rubbed it against a piece of glass. They observed three stages of tire deformation: Leading Tread Deformation, Contact Patch, and Trailing Tread Deformation.
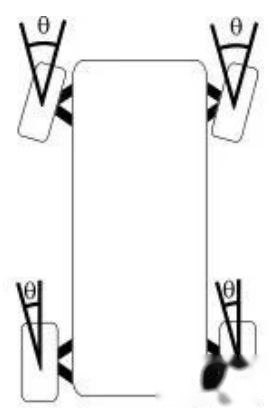
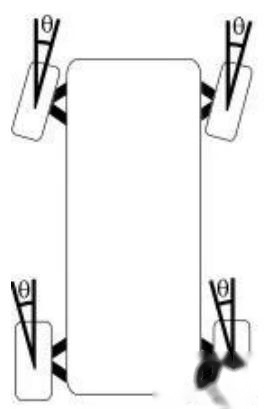
When a vehicle enters a corner, the tire's contact patch deforms toward the outside of the corner, and this deformation pulls the tread that has not yet touched the ground outward along with it (leading tread deformation). Grip is generated at the contact patch, and the place with the most grip is at the very rear (bottom) of the contact patch, where the deformation is greatest. When the tire begins to slide, the sliding also starts at the rear of the contact patch and gradually extends forward as the degree of sliding increases. There is also a very important variable: the angle between the tire's actual rolling direction and the direction the tire is pointing — the "slip angle." It is easily confused with the "yaw angle," which is the angle between the direction the front of the car is pointing and the vehicle's direction of travel.
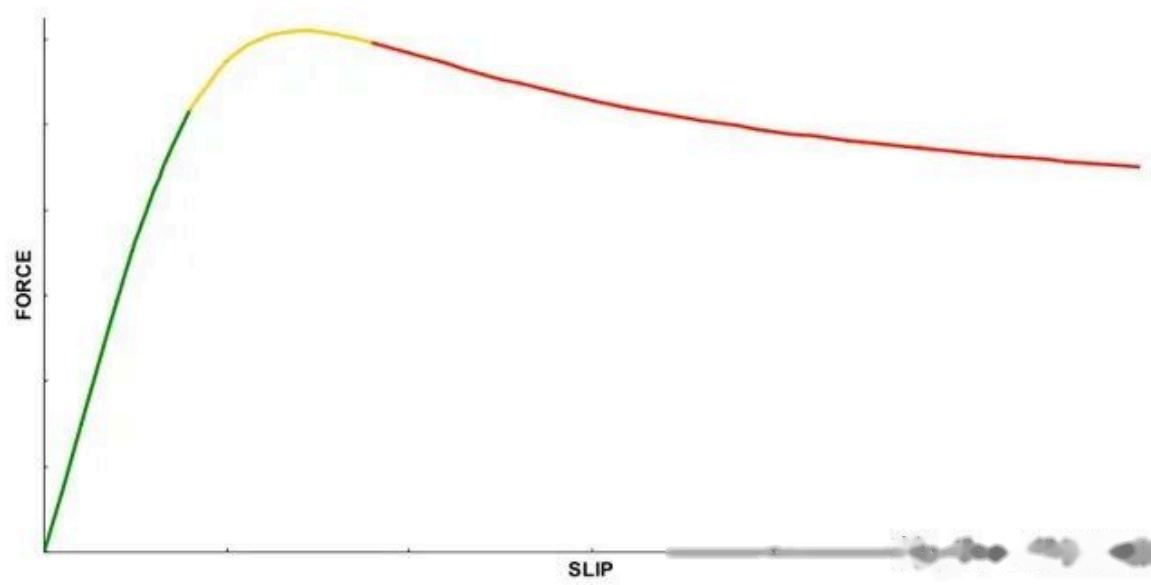
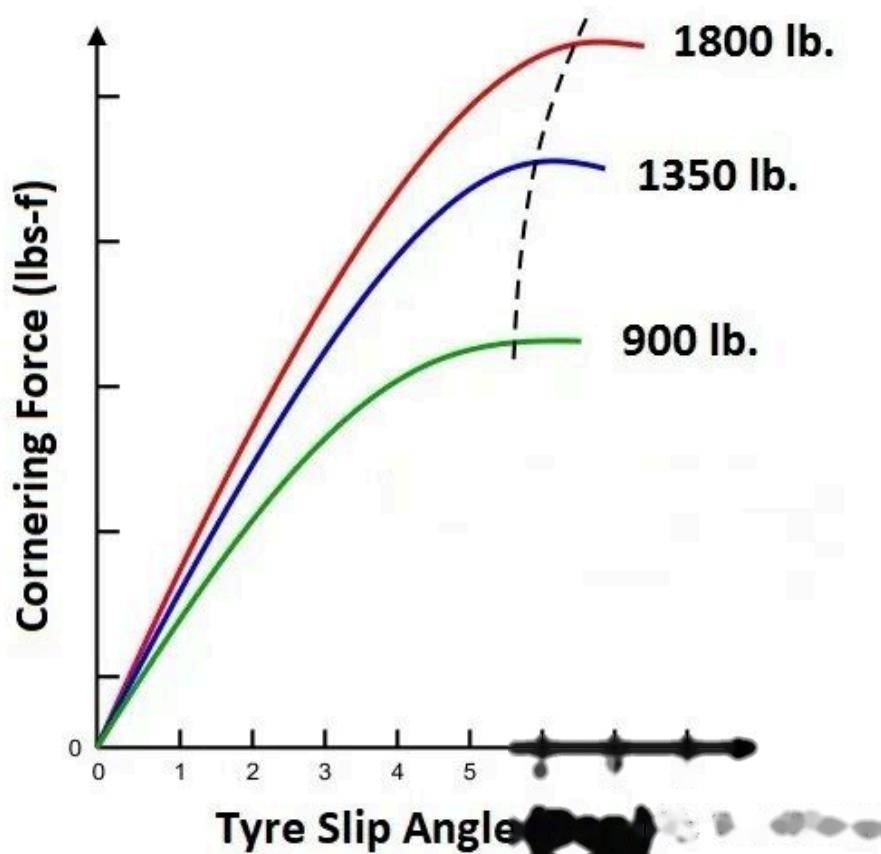
After understanding slip angle, a tire's performance can be measured using a force-vs-slip-angle graph. Initially, the tire does not slide at all, and friction rises almost linearly as the slip angle increases. When the slip angle reaches a certain point, the tire begins to slide, and the increase in grip gradually slows down. During this process, grip reaches a maximum value, and then begins to decrease as the slip angle continues to increase.
In this graph, we can see not only the maximum grip value of a tire but also some additional information. If grip drops rapidly after the peak, we can infer that the tire's sliding will start more abruptly, making the car harder to recover. This graph also gives us a clearer understanding of the meanings of "neutral steer," "understeer," and "oversteer" in terms of tire slip angles. When a car corners neutrally, both its front and rear tires are at the slip angle that provides maximum grip; theoretically, this is the fastest way to corner. When a car understeers, the front tires experience a larger slip angle, reducing their grip, which gives the driver the feeling that the front of the car does not want to turn in (pushing). Conversely, an excessive slip angle at the rear tires leads to oversteer (which is why drift cars are usually tuned to understeer heavily — they need to cooperate with the intentionally reduced grip of the rear tires). Therefore, a veteran driver should understand that oversteer or understeer is not directly related to the vehicle's drivetrain layout, but rather to how the tire's slip angles are utilized.
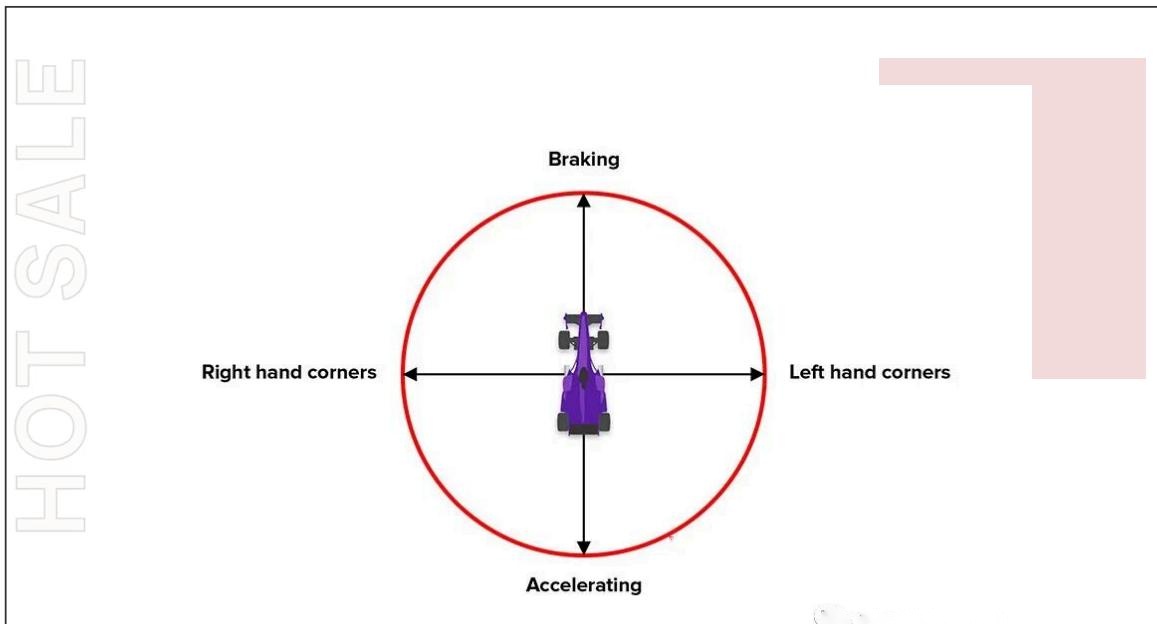
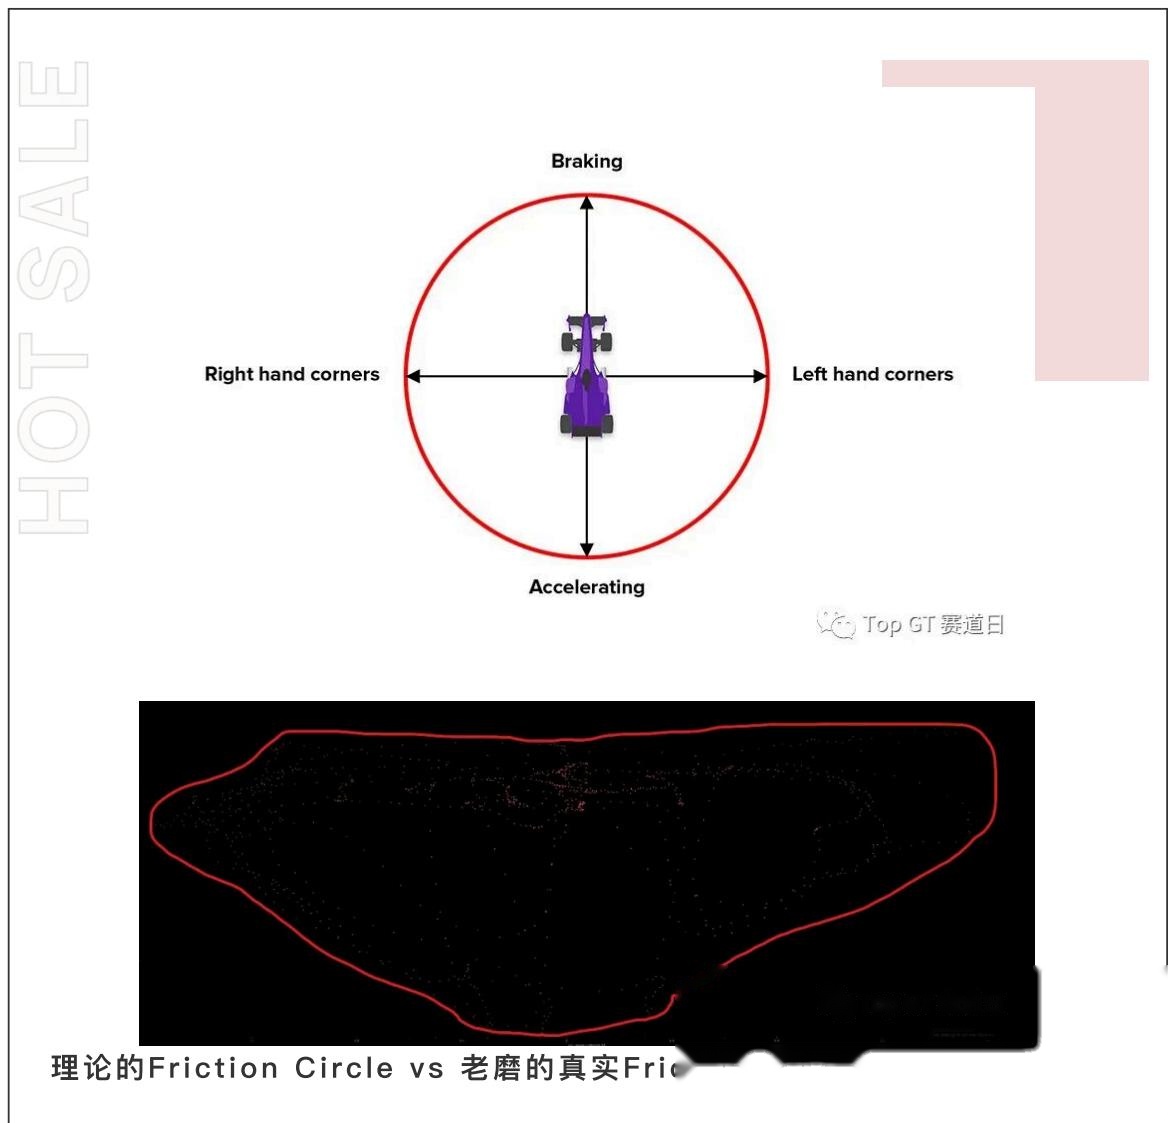
After knowing a tire's ultimate grip, we can draw a circle showing the maximum grip of the tire in all directions, known as the "friction circle." In reality, this shape might be more elliptical because grip in the rolling (longitudinal) direction is slightly lower than lateral grip. For a driver, the most important task is to draw this circle as perfectly round as possible within the tire's limits — meaning the tire's grip is utilized thoroughly.
Finally, I want to talk about a concept of great significance in car design and tuning: tire load sensitivity. This describes how the cornering force of tires of the same width varies under different load conditions. At first glance, it seems logical — a tire's grip increases as the load applied to it increases. But looking closely, we can notice two interesting things:
(1) Tire grip does not increase linearly with increased load, meaning the grip gained from dynamic weight transfer does not increase linearly. (2) As load increases, the slip angle corresponding to maximum grip is slightly delayed.
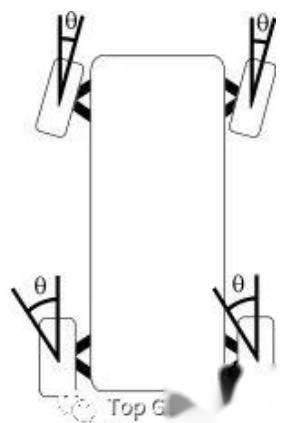
Regarding point one, it is worth noting that this reflects the relationship between tire pressure (weight supported per unit area) and grip. As the pressure on the tire increases, the rate of increase in grip slows down. This is why, given the same vehicle weight, wider tires provide better grip. As for the second phenomenon, it has a very important application in race car design, namely Ackermann steering geometry. But I want to keep you in suspense here: why is reverse Ackermann steering geometry used in race car steering design? We will release the answer in the next article.
Takeaways for Beginners
After understanding the concepts above, does our guiding principle for choosing tire upgrades change? For beginners, the TOP-GT drivers believe that any modification should focus on the following aspects:
- High cost-effectiveness: Affordable running costs, striking a balance between lifespan and performance.
- Safety and forgiveness: Provide sufficient safety and not punish driver errors severely.
- Clear feedback: Provide feedback for learning driving techniques, meaning obvious signals of driving errors.
- Appropriate scaling: Match the driver's ability; neither under-modifying nor over-modifying is ideal.
Overall, the tuning philosophy should serve the driver as much as possible, allowing them to learn and practice driving.
Applying these principles to tires, we believe a suitable tire for beginners should:
- Have a treadwear of 220 or above. Higher treadwear usually means lower grip. The benefit is that the slip angle range is often wider, making vehicle dynamics slow and smooth enough for beginners, making it easier to recover the car. Lower speeds can induce understeer or oversteer, avoiding the danger of high-speed spins. Negative example: any tire with a treadwear of 200 or lower.
- Avoid upgrading tire sizes if possible. The suspension of a stock car is usually matched to the stock tire grip. Upgrading tire size often breaks this balance with excess grip, making vehicle dynamics sluggish and unpredictable. The focus for beginners should be mastering dynamic weight transfer; excess grip not only does not help but can be counterproductive in some cases.
- Have sufficient steering clarity. Vague steering causes the driver to lose their grasp of tire grip feedback. The clearer the steering, the more it helps the driver learn how to utilize tire grip.
- Have a broad working temperature range. Beginners should avoid worrying about tire temperature changes and usually lack the ability and equipment for strict temperature management.
- Offer consistent grip. Tire grip should not change significantly with temperature. Inconsistent grip makes it hard to learn driving at the limit, making learning signals unstable and less valuable. A negative example of this is the Bridgestone RE71R.
- Have low wear. To reduce tire replacement costs.
- Provide multifaceted grip feedback signals. Besides steering feel and data analysis, sound is often a primary channel for driver feedback. Beginner tires should squeal early and loud enough.
Have you gained an understanding of tire selection by now? Want to experience controlling tires on the track yourself? Leave us a message — we will answer your questions and help you get on track!